Saturday, April 22, 2006

Bob's Bug - The Exodus and Bob's TO - DO List


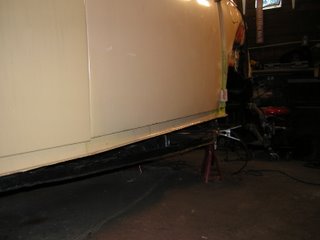
Saturday, April 22. 3 days after the original due date. I will be towing Bob's bug to Orillia today. It's been a fun experience taking this rough shell to a solid, safe vehicle. I am really surprised that it is actually done. The number of unexpected obstacles has been incredible: auto-stick to manual conversion, lower frame head installation, transmission reverse gear repair, Bob's Honda seats, Bob's refusal to do the wiring, troubles bleeding the brake system, and the list goes on.

The vehicle is being passed to Bob in running, driving condition. All the wiring is now functional, with the exception of the horn and rear window defroster. We may also need a replacement high / low beam relay, but this is rather insignificant in the grand scheme of things.

Here's a list of items Bob should complete, items for safety first, followed by other general items:

SAFETY RELATED:
  • Repair horn button or install auxillary button. Simply connect one side of the switch to ground, and the other side to the brown wire near the fusebox. The horn and power supply provisions have been provided, per stock. If the original horn button is fixed, simply connect the two wires together near the fusebox - I will show you the details.
  • Cut and install temporary steel covers over holes into passenger compartment
  • Install heat ducts from heat exchangers to cabin, or install sheet metal covers over heat duct holes
  • Install licence plate bulb
  • Install headlight

NON-SAFETY RELATED:

  • Install heat lever kits and connect heat from passenger compartment entry to heat channels, including cutting hole into channel for access
  • Adjust choke, Adjust points, check timing (I'll loan my timing light), and go through 34 PICT 3 idle adjustment procedure to set carburetor
  • drill, tap, and install front wheel centre caps
  • remove, drill, tap, and reinstall rear wheel centre caps
  • install door weather stripping
  • install drivers window felt and weather stripping

That's all I can think of for now!
Tow Bar Modification


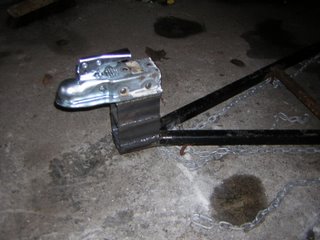
My VW tow bar was included in the purchase of my 1974 Thing. It was custom made by the previous owner, and is very sturdy. Theoretically it should tow any type 1 Volkswagen with torsion bar front suspension. However, when I towed Bob's Bug home from Quebec I realized that even at stock ride height, the tow bar was exerting force on the front clip from underneath when attached to the tow vehicle. This is because the tow bar was straight, designed for the Thing that rides quite high. Now that Bob's bug is lowered it would put even more force on the front clip and bend the new sheet metal. Traditional VW tow bars have a bend in the bar and the coupler is 6 - 8 inches higher than the connection to the vehicle. My quick fix was to buy a nw coupler ($6.95 on sale at Princess Auto), and some 2.5" square tubing. I set my welder to its highest setting for the .025 wire I run in it, and welded three lengths of tubing and the coupler to the tow bar, giving me a 7.5" higher drawbar than before. To check for strength I pounded on it with a sledge hammer with no ill effects.

Bob's Bug - The Seats


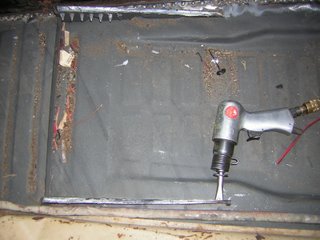
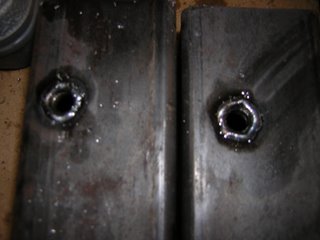
As mentioned in the last post, this seat installation was something of an afterthought for Bob. Seeing him trying to squeeze into the orginal seats was justification enough for this modification. Rather than drill and bolt the new seats to the original seat tracks in a haphazard fashion, I decided to do the right thing and fabricate new seat mounts, custom sized for the Honda seats, retaining the Honda seats' built-in adjustability. The pictures show me removing the original seat tracks, removing the rear mounts from the seats, and drilling and welding threaded inserts into the new seat mount bars (2 x 2 x .125 wall thickness steel. After my first fit-up I realized the seats would be a shade low. I also had some clearance issues with the brake line and the wiring harness. I decided to cut 30 degree angles on the ends of the new mounts, then weld 2 x 1 steel underneath, to get the correct height. Once this was complete I bolted the seats to the mounts temporarily and tacked them onto the floor. Then I removed the seats and fully welded the new mounts and welded in the holes left by the removal of the original tracks.

Wednesday, April 19, 2006

Bob's Bug - Overtime!

Once again, lots of work, not many pictures. Bob and I attended the Wet and Chilly Swap Meet at Johns Bug Shop - www.johnsbugshop.com in Niagara Falls this weekend. It was a successful outing. I made about $125 and got rid of a lot of junk. Bob sold some stuff too.

The original plan was to tow the car to Orillia on Tuesday after work. Bob was going to have it certified and on the road the next day. However, Bob got the great idea of buying a set of 2001 Honda Civic seats at the swap meet, meaning I have to custom fabricate mounts to fit them in the bug. The purchase of these seats represent a significant shift in the customization of the car. Bob will now run the car as a two seater, with a parcel shelf / stereo system in the place of the old seat. Pics will be forthcoming in the next post for the seat install.

In the meantime, here's a list of the items completed and obstacles since the last post:

  • charging problem fixed with engine in car - I simply cleaned the armature per the Muir book and presto - no more generator light
  • transmission started leaking fluid everywhere :-(
  • the source of the leak was the reverse light switch, which must have broken when I installed the wiring. A replacement was found at Hayman motors in Toronto and installed.
  • seat mounts designed and fabricated (pics to follow), partially installed
  • all missing switch components were found at the swap meet and installed
  • wiper arms and wipers were purchased at JBS and installed

Tomorrow I have a dinner date. I'm hoping to finish the seat installation after dinner. This will leave the final wiring hook up and check, hook-up of the heat system, installation of the rear apron tin, and fabrication of sheet metal patches to seal off passenger compartment. Worst case I need to finish the seats. I am taking the car to Orillia on Saturday, at which time Bob can finish the odds and ends, but it is still my goal to take him a fully functional vehicle.

Check back next week. By then I should have seat rail fab and installation pics, final pics of the hand-off of the car, and the start of the new project - getting my Westfalia ready for the camping season!!!

Thursday, April 13, 2006

Bob's Bug - The Countdown Continues

Well, no pictures this time around... I've been working so much on the car I haven't been able to take any pictures. What I can do is list off the tasks that have been accomplished since the last post:

  • transmission filled, sealed, reinstalled
  • transmission custom shift coupler reattached and adjusted
  • clutch cable installed
  • pedal cluster rebuilt and installed, including master cylinder pushrod, accelerator cable, clutch cable
  • engine seals installed
  • engine installed
  • brakes bled (this was a problem - I wound up making my own pressure bleeder system whereby I could apply 15 psi of air pressure to the master cylinder resevoir, forcing the fluid through the system)
  • brakes adjusted (will need final adjustment still)
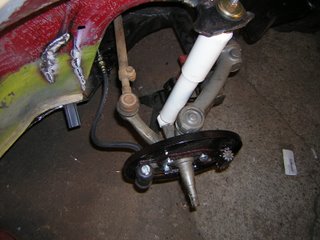
  • problem with front bearings / spindles discovered, spindles machined down slightly with sandpaper and elbow grease, new inner bearings and races installed
  • front ride height adjusted
  • toe-in (alignment) adjusted per the "Idiot Book"
  • gas tank, fuel lines, fuel filter installed
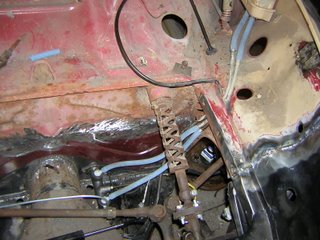
  • wiring mess sorted out, fished through car, engine compartment wiring finished, adapted from auto-stick wiring harness (new wires for starter solenoid, back-up lights, etc.)
  • under-hood wiring partly completed
  • car started!!!!! I have a video of this - I am looking for somewhere to post it. The look of surprise on my face is priceless!
  • car driven up and down my street, through all the gears. this was pretty rewarding

Known issues / obstacles:

  • currently not charging - possible generator / regulator / wiring problem?
  • wiper arms missing
  • some switch components missing
  • heat ducts need to be connected

Well, tomorrow I will put a few hours in on the car, then Saturday I'm off to a VW swap meet. My fingers are crossed I can pick up the necessary parts to get this car safetied and out of the shop next week!

Friday, April 07, 2006

Bob's Bug - Transmission Giving me the Gears!!


Okay, I knew it was all going too easy. I installed new mounts on the tranny (sold with the car as a working unit), hooked up the new coupling, then (thankfully) tried turning the input shaft to check the operation of each gear.... No matter what, reverse wouldn't work! Reverse was acting as a second neutral. Then, turning the ouput collars backwards somehow started to move the input shaft backwards, a few turns and it came right out in my hand, with a small stud on the end!

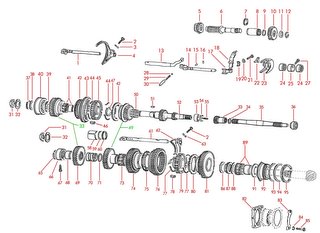
So, what do I do? Buy a new tranny? After reviewing a few texts and asking some questions I surmised that the circlip (#34) had somehow worn off the input shaft (#35) allowing the reversing sleeve (#33) to slip back on the shaft. This would disengage the splines between the input shaft extension and the main transmission shaft, allowing the shaft extension to come out in my hand. So, after some encouragement from the forums on www.thesamba.com, I decided to remove the tranny, drain it, and see if my crazy theory could possibly be correct.

As you can see from the pics, I was bang on! The reversing sleeve and circlip were sitting in the bottom of the tranny case once I removed the output flanges, side cover, and differential. I quickly cleaned up the mess, slid the reversing sleeve temporarily in place, and ran through all the gears. Everything worked perfectly. So, it was off to CTC for a new circlip ($0.50) and new fluid ($14).

Tonight I fit everything backup based on the Haynes manual instructions (slide the input shaft in, slip on the circlip, slide on the reversing sleeve, slide it forward, engage the circlip, reassemble).

Now the tranny is sealed back up with RTV sealant, all bolts torqued to spec, refilled with 75-w-90 hypoid oil, and waiting to be reinstalled in the car!!

Thursday, April 06, 2006

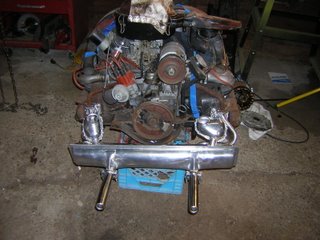
Bob's Bug - Ceramic Coated Exhaust Installation

Well, this part is pretty self explanitory... A few pearls of wisdom:

1. Cip1.ca should learn that it would reflect highly on them to include the $9 heat exchanger lever and gasket kits in their $500+ all inclusive exhaust kit!! Luckily we don't need heat right away so we can do without the levers, but I had to run to NAPA for 2 exhaust gaskets - $0.30 from cip1.ca, $5 ea from NAPA. At least they had them.

2. I have an 8mm tap, but no dies. From past experiences I learned to lube and gingerly chase out the threads on the exhaust studs using a fresh nut. The last thing I want is for any corrosion or imperfections on the stud to cause the exhaust nuts to bind and shear off the stud!

3. This car did not come with an engine, and most of my parts engines didn't have heat exchangers. Basically the exhaust kit did not come with the clamp that connects the fresh air pipe on the heat exchanger to the muffler shroud. I will use stainless steel / aluminum plumbing parts that will have a nice complimentary look. I don't know why cip1.ca doesn't include these in the ceramic coated kit as well???

4. I don't think I'll ever buy an exhaust for this sort of application again that ISN'T ceramic coated... This thing rocks!!

Bob's Bug - If at First You Don't Succeed, Try, Try Again!


Hmmm. Somehow Murphy always works his way into these projects, especially when you can most do without his presence. When I first got this car home I realized it was once an AutoStick - you can read about my clutch tube installation in an earlier post. The remainder of the conversion (sourcing a manual tranny, replacing the shift lever and shift rod, converting the engine, etc.) was apparently done before, according to the previous owner, who claimed he knew the car was once an autostick but that it had been driven as a manual car.

Well, the fact that I had to supply a shift lever (none came with the car) should have been an indication that the shift rod hadn't been changed. Once I installed all new mounts on the tranny and installed it (not pictured), I installed the shift rod, shift lever, reverse lock-out plate, new shift bushing, and shift coupler. Then I realized the shift rod would not meet up with the "hockey stick" on the tranny.

So, to get out of this bind I decided to modify the transmission coupler to accomodate the shorter auto-stick shift rod. After two tries, I got it right. Basically I welded a 7/8" OD, 3/16" wall thickness steel tube to the new shift coupler, drilled it out to 5/8" ID, then drilled and tapped an 8mm hole for the special coupler bolt to thread into the "hockey stick". The trick was getting the length and the offset of the 8mm tapped hole right.

Anyway, in the end I found a winning combination and can shift through all the gears.

Tuesday, April 04, 2006

Bob's Bug - The Beginning of the End


Well, this past weekend, Bob himself arrived in Oshawa and started assisting me with his car. The weekend was action packed - full of working, spending, visiting, and eating. The only thing we were short on turned out to be pictures... Here's a summary of the work we completed:

-Body lifted, body to pan seal installed, body bolted securely and permanently to pan
-Steering box transferred from old front beam, tie rods installed, new steering dampener and steering coupler installed
-Rear brake backing plates removed, refurbished, reinstalled. Front brake backing plates (previously refurbished by Bob) installed
-Complete brake system overhaul including new master cylinder, new wheel cylinders, new hardware kits, new hard and flexible brake lines and grommets. Existing drums and shoes seem to be in good shape and were reused
-New front wheel bearings packed and installed
-New front windshield installed using new rubber seal (this was effortless!!)
-missing and rotten front fender nut inserts removed, new ones welded in solid
-Front fenders and new fender beading installed
-Rear fenders fully bolted in place
-new EMPI lowered front shocks installed
-new stock rear shocks installed
-seats installed
-wiring harness looked at by Bob and left for me!!!! Uh-oh, wiring is his specialty!!!

There are lots more updates to come in the next few days. This car needs to be saftied and running by the 19th of April. Tasks ahead of me include installing the new ceramic-coated muffler and heat exchanger kit, installing the transmission, modifying the new shift coupling to adapt the shift rod from auto-stick to manual, install and troubleshoot all wiring, bleed the brakes, install gas lines, install the engine and run it, get new tires installed, etc., etc., etc...