Friday, May 26, 2006

The Lime - Show Prep and Michigan VW Show


May 21, 2006 was the 19th Annual Vintage Festival hosted by the Michigan Vintage Volkswagen Club in Ypsilanti, Michigan. This was long planned to be our first outing in the new Westfalia.

Prior to departing on the trip we had a long to-do list. As you can see from the pictures, Vanessa insisted on fabricating new interior panels for the van. I cut them from a 4 x 8 sheet of plywood. Vanessa sanded them and I stained them in green water based stain.

Vanessa also used her new steam cleaner to clean the original Westfalia plain cushions. You should have seen the dirt come out of them!

I also installed our Innovatek radio from www.mp3playerstore.com, purchased during a promotional no reserve auction at www.ebay.ca for $60 very late at night prior to our departure. The radio is actually a DVD/MP3/CD/TV/AM/FM/WMA player. I rigged it with a toggle so it is triggered either by the ignition when driving or the toggle when camping. I wired it into 4 Rampage 60 Watt 5" speakers purchased for $9.99 a pair from Princess Auto. I recently won a 8.4" colour screen from the same company in a similar auction for $67 and will be installing it shortly to make use of the DVD and TV features of the radio. Pictures will follow once this is installed fully. Oh, by the way, the radio sounds great, especially when you can hear it over the engine noise.

The last pics are me driving along the 402 near Sarnia, Vanessa in front of the Van at the KOA in Ypsilanti, and our van (the one in the middle) on display at the show!

Watch the next posts for images and repair info on the steering system. We were lucky to make it home from Michigan as the van now sits in our driveway with no steering whatsoever!

Tuesday, May 16, 2006

The Lime - Exhaust Replacement


I bought the Westy with the foreknowledge that there was a minor exhaust manifold leak, causing a leaning of the mixture and backfiring. Being familiar with type 1 engines I thought very little of it - other than the backfiring, the van sounded fine! Well, I got a safety certificate, which was a minor miracle in itself... Because when I got the van home and checked it over I found a plethora of problems in the exhaust system!

First of all, the worst part is that other than the eliminator style exhaust that was on the van when I purchased it, it retained its stock style exhaust. Vans produced from '72 - '74 had a simpler exhaust system where the exhaust manifolds were part of the heat exchangers, which led directly into the exhaust. The '75 - '78 vans (mine included) have a very complex system that consists of two different exhaust manifolds, two 180 degree u-pipes and heat exchangers. From there on my system was replaced with an eliminator exhaust, but original vans still had a 90 degree elbow, a crossover pipe, a catalytic converter, a muffler, and a tail pipe!!!

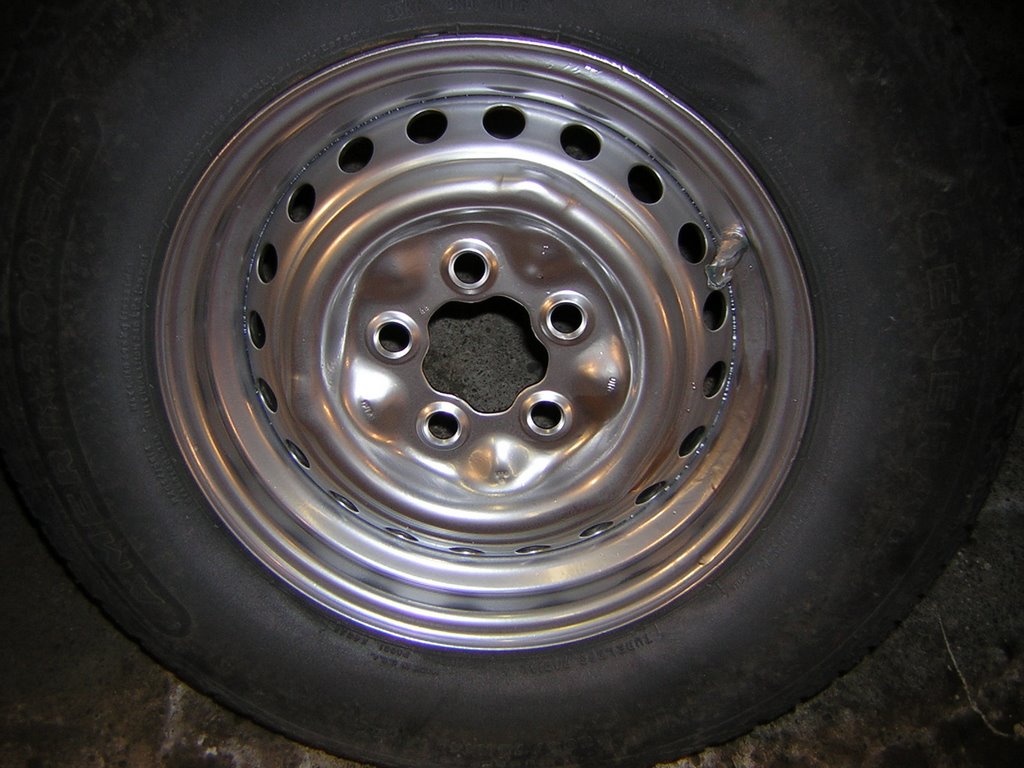
Secondly, when I examined the current system I found poorly repaired and unrepairable rot in the muffler itself - no biggie. I also found that the U-pipes on the van were very worn and severely leaking (see picture above - note the thin flanges), and worse yet, the exhaust manifold was leaking (see the carbon traces in the picture above). Removal of the parts and further examination ensued. Basically I deemed that the U-pipes and one manifold were unrepairable. I eventually sourced good used U-pipes and a used manifold that needed a repair. I also ordered a BUGPACK header and quiet pack system (recommended by two sources as the best of the cheap exhausts) from www.cip1.ca. Since my heater boxes were relatively new (and they're in the magnitude of $300 each) it didn't make sense to convert to the older style of exhaust, since new heater boxes and engine tin would be required.

Though the manifolds are made of stainless and cast iron I was able to find a setting on my mig welder that yielded good penetration on both parts. I spent quite a bit of time repairing and strengthening both, including building up the flanges with weld.

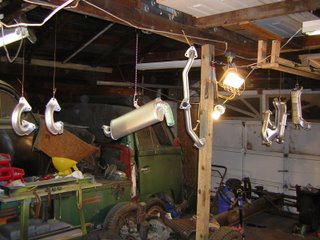
Next I sandblasted everything, including the new parts, since they are shipped only with a rust-preventative paint that can't handle heat. Once sandblasted I hung everything and sprayed them with POR20 high temperature paint I purchased locally from http://www.tgfbumper.com/. This product has mixed reviews on the 'net, but was the only high temperature product I could find that can handle 1200 degrees F plus and is a non-aerosol. The aerosol solutions usually don't last too long.

Once two thin coats were applied 24 hours apart I was ready to install everything.

The first step was removing the old copper seals from the heads, which was a rather difficult job. I wound up bending a jewelers straight-blade screwdriver and using it as a tiny prybar. Once out I cleaned the mating surface of the head. Then I moved into the garage and laid some 100 grit sandpaper on a flat work surface. I used this paper to make sure both mating surfaces on each manifold was filed perfectly flat. Next I used a propane torch, following the instructions on www.ratwell.com and annealed the new copper sealing rings. Did you know that normally the copper will make a ringing sound when dropped on concrete, but once annealed will make a dull clunk? Neat! Anyway, this process softens the copper so it seals better. Once annealed I installed the manifolds onto the engine and torqued the self-locking copper nuts down using my brother's torque wrench to 18 foot pounds.

The rest of the process is just the reverse of removal, with new hardware. 21 8mm bolts, washers, lock washers, and nuts, sweat, tears, and some blood.

Check out the pictures.. It was all worth it. Oh, and it sounds good too! Plugging the exhaust tip with a rag stalls the engine in a few seconds - no leaks!

My initial concerns about the low hanging header system are gone - it leaves just enough room under the bumper for a hitch!! See that in an upcoming post!

Monday, May 15, 2006

The Lime - Wheel Refinishing


In my opinion, nothing is more of a detractor in the looks department from a vehicle than dirty, rusty, ugly wheels. Our Westfalia was suffering from this problem, as evidenced by the first picture above.

In the past, my options for restoring the wheels would have been getting them sandblasted by a sandblasting firm or wire brushing them with an electric drill (as I did on my yellow SB), then painting them with spray paint. Now that I have a large air compressor I am able to do many things at home that I would have farmed out in the past.

Using my pressure pot sandblaster and about 15 pounds of sand, I took all four wheels down to bare metal. I removed all the balancing weights from the wheel. Next I masked them using I technique I read about online - using aluminum flashing and a clamp to wrap around the lip of the rim of the wheel rather than trying to make masking tape bend in a perfect circle. This step alone was a vast improvement over any way I've tried this in the past when the tires were still on the wheel.

I then thinned some Tremclad grey primer with mineral spirits and shot it at about 50 psi with my gravity feed HVLP gun. After drying overnight I loaded the gun with Tremclad aluminum paint and laid down the first coat. Another 24 hours later I abraded the first coat with a scotchbrite pad and shot the final coat of Tremclad.

I am happy with how the wheels turned out. I had a local shop balance them again and now they are ready to go back on the car. I have brand new VW hubcaps for them too!

Wednesday, May 10, 2006

The Lime - Pop-Top Replacement Part 3


Having some trouble posting lately, sorry for the delay. This is the pop-top conclusion. Basically I used the old support tube as a jig and drilled through the threaded rod. Next I cut a small section off the end of the old support tube to act as a bushing around the threaded rod. Next I installed the new strut into the old support bracket and put it back into the van.

Now I am happy to report I have full adjustability up and down. I don't have a picture, but I have added a second nut on each side so I can lock the nuts together at the required height. Overall I am very happy with the change. I have perfect tension now all the way around and I don't have to worry if the tent shrinks or stretches, I can easily make up the difference!!

Sunday, May 07, 2006

The Lime - Pop-Top Replacement Part 2


After all the work of replacing the poptop I was dismayed to find out it was too tight! After posting my problems on www.thesamba.com for help it was heavily advised I take the canvas back off and restaple it. My concern in doing this was that I followed the replacement steps exactly, including draping the canvas over the tacking strip. My research indicated that many of the replacement tops are too short meaning you can't properly drape the top over the tacking strip.

One interesting solution I read about was cutting the support struts to relieve the tension. I wasn't fond of this idea at first since I didn't know how much to cut off, and I didn't want to damage the van irreversibly. In other words, if the top stretches or I replace it again with a different brand I would like to be able to put it back to stock height.

So, I devised this adjustable strut modification!

The pictures show me removing 4" from the support strut, cutting a 5/8" diameter threaded rod to a 12" length and test fitting it in the remaining strut. Next I removed the support bracket from the end I removed from the strut, and used the remaining scrap piece as a jig to drill through the threaded rod.

Check the next post for the conclusion!

Saturday, May 06, 2006

The Lime - Pop-Top Replacement Part 1


Last weekend I started what I thought would be an easy job - the replacement of the pop-top canvas on my '76 Westy. It turned out to be a very time consuming job in the end. I followed the procedure as written in an old issue of VW Trends, except I left the top on the van. Basically it entails removing the old completely, measuring, marking, and tack stapling the new tent into the top, then fully stapling it with tacking strips, followed by a reinstallation of the aluminum retension strips with hundreds of small phillips screws at the roof of the van. It was very tricky to get the new tent to fit just right but in the end I am happy with how it looks.. Well, almost.. Read on.

The pictures above show the old tent in the process of being removed and fully removed. The item I'm holding in my hand is a sample of the tacking strips I manufactured from PVC door stop since the originals shattered.

The final picture is what I hoped would be the final product... It looks good, but it's WAY TOO TIGHT at the front!!!!

See the next post for my solution..