Saturday, September 09, 2006

Brad's Birthday Wish List

Here's a list of the items I need for my birthday, coming up quickly on the 24th of October. Please discuss amongst yourselves to determine how this list will be fulfilled. Please don't forget about the lead times on shipped items - you should consider purchasing these items as soon as possible to make sure you have them in time!

REVOLUTION COVER FOR THE LIME
http://www.cip1.ca/ProductDetails.asp?ProductCode=C13%2D15%2D6409

CYLINDER HEAD TEMPERATURE GAUGE
http://www.cip1.ca/ProductDetails.asp?ProductCode=VDO%2D310%2D901
-or-
http://www.germansupply.com/home/customer/product.php?productid=16133&cat=340&page=3

KAFER CUP BAR (FOR SUPPORTING THE ENGINE IN THE LEMON)
http://www.cip1.ca/ProductDetails.asp?ProductCode=C12%2D6518%2D11

MIRROR FOR THE LIME
http://www.cip1.ca/ProductDetails.asp?ProductCode=C24%2D211%2D857%2D514%2DF

UPPER BUMP STOP (2 REQ'D)
http://www.cip1.ca/ProductDetails.asp?ProductCode=VWC%2D211%2D401%2D253

LOWER BUMP STOP (2 REQ'D)
http://www.cip1.ca/ProductDetails.asp?ProductCode=VWC%2D211%2D401%2D263%2DA

BUMP STOP CLIPS (4 REQ'D)
http://www.cip1.ca/ProductDetails.asp?ProductCode=VWC%2D211%2D401%2D279

BOB'S SHIFT ROD
http://www.cip1.ca/ProductDetails.asp?ProductCode=VWC%2D111%2D711%2D155%2DG

BOB'S BUSHING
http://www.cip1.ca/ProductDetails.asp?ProductCode=C24%2D111%2D701%2D259%2DA

BOB'S COUPLER
http://www.cip1.ca/ProductDetails.asp?ProductCode=VWC%2D311%2D711%2D245

HEAT CABLE CLAMPS
http://www.cip1.ca/ProductDetails.asp?ProductCode=VWC%2D111%2D298%2D101%2DA

LEFT HEAT CABLE
http://www.cip1.ca/ProductDetails.asp?ProductCode=VWC%2D211%2D711%2D629%2DN

RIGHT HEAT CABLE
http://www.cip1.ca/ProductDetails.asp?ProductCode=VWC%2D211%2D711%2D630%2DN

CABLE CLAMP (2 REQ'D)
http://www.cip1.ca/ProductDetails.asp?ProductCode=VWC%2D311%2D129%2D777


PRINCESS AUTO ITEMS
-$500 - $750 gift certificate will suffice
-looking into combo metal brake, shear, roller ($499) or at a minimum metal brake ($250)

MISC ITEMS
-universal mitre saw stand (brand or supplier not important)
-additional CIP1.CA gift certificate for misc. parts (in addition to the items above)

Please email me directly with any questions. It is essential all of these items be purchased!

Wednesday, September 06, 2006

The Schmidt POS Show...


Keen observers may have noticed another recent change to the blog... Vanessa's anniversary gift was a Canon S3 IS digital camera and our pictures got a whole lot better. Naturally, not every picture on the blog will be taken with the new camera - it's not allowed in the garage!!

The pictures it takes are very large and need to be resized for posting online so the size of the pictures here is actually smaller than before.

These are some magazine style shots I took a few weekends ago of The Lime and Bob's Bug. I snuck a few minutes with the camera while Vanessa was having her hair done...

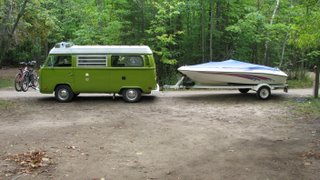
The Lime and The Toad - Labour Day Camping 2


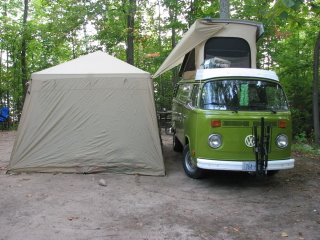
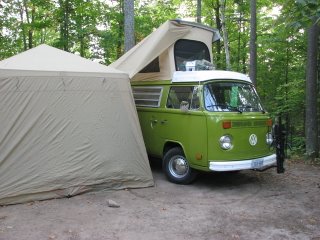
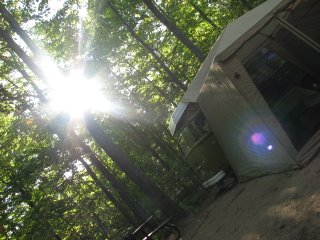
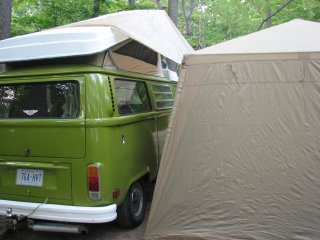
For some reason Blogger wouldn't let me edit the last post with these pictures. So, here you go. This is the van set up for a rainy long weekend at Restoule Provincial Park...

Tuesday, September 05, 2006

The Lime and The Toad - Labour Day Camping


This post marks a change in the format of this blog. Formerly "Brad's Project Blog," it was designed as a vehicle to show my friends, family, and colleagues the progress on my projects. It also served as a convenient and free host for pictures I reference on various sites.

The blog, accessed at the same address, is now called "Brad and Vanessa's Blog". I will still showcase my projects, but now always step by step. I will also be posting more personal shots of us enjoying the projects, as you can see in the photos above.

These were taken at Restoule Provincial Park in Restoule, Ontario - just south of North Bay. I'll post more pictures of the van setup later...

The Garage - Update


Once again, it's been a long time since my last post. My apologies. With work, camping, boating, social obligations, etc., I've been working on the garage solely weeknights, after work.

The pictures above detail the most exciting phase of the construction: demolition of the old walls (exposing the new walls behind) and erection of the Smart Panel sheathing. Somewhere in there I also fit installation of the man-door, burying of the power conduit, installation of a new Siemens breaker box, and other things too, I'm sure.

When we first started on this project the idea was to have a dumpster dropped off for the waste. However, I decided against it for two reasons... Firstly, the waste was quite bulky and I worried it would fill the bin, requiring a second drop-off fee. Secondly, because of the slow pace of construction (and destruction), I was worried I couldn't produce all the waste in the 1 week window that they leave the bin.

It turned out to be a wise choice. After taking the walls down in sections (with my chainsaw) I rented a U-Haul 5 x 9 open trailer. From 8am to noon I ran loads from home to my local transfer station with the walls and assorted waste. In total it cost $236 and I dumped over 5000 pounds of waste.

Once the garbage was out of the way I was able to put up the Smart Panel sheathing. It went up well with PL200 and nails from my nail gun. My dad (of Bob's Bug fame) helped with one wall.

The man-door and wiring went in with little trouble, though drilling through the pad to run a flexible conduit proved easier than sourcing the drill bit with which to do it. CTC, Home Depot, Millwork, Holland Building Centre, and countless other stores in town did not have a 1" masonry drill bit in stock - let alone one long enough to go through the concrete pad at the right angle. Of all places, I found one right off the shelf at Home Hardware in Gravenhurst, Ontario for $40. Naturally, the popcorn was complimentary.

The inside shots show the framing - some fire bracing left to do, the headers in place for the windows to be installed sometime in the future. The front wall was insulated before the siding was installed. All other walls will be insulated as well once the wiring is complete.

I now have some final work to do in the roof. Then the rotten overhang of the roof will be cut off flush with the wall. Next I will mark 12" up from this point and remove the rotten decking boards. New tails will be installed and 5/8" roof sheathing overlapping the 12" exposed and creating a new 12" overhang. Then shingles, fascia, soffit, exterior moldings, paint, etc., etc., etc...